Service setup
Installing Dashly is basically adding our script into each html-page (which should have our service operational) of your site.
This script asynchronously downloads a JS library and creates a dashly global object, which is used in API interactions.
JS-library communicates with our server via REST API and uses WebSocket for chat messaging.
Important! Our code operates asynchronously and does not affect other files or scripts loading speed.
Where can I get the code?
You can get code by opening "General settings" section in admin panel, and clicking "Code for the installation" tab. Then choose "With code" to get code.
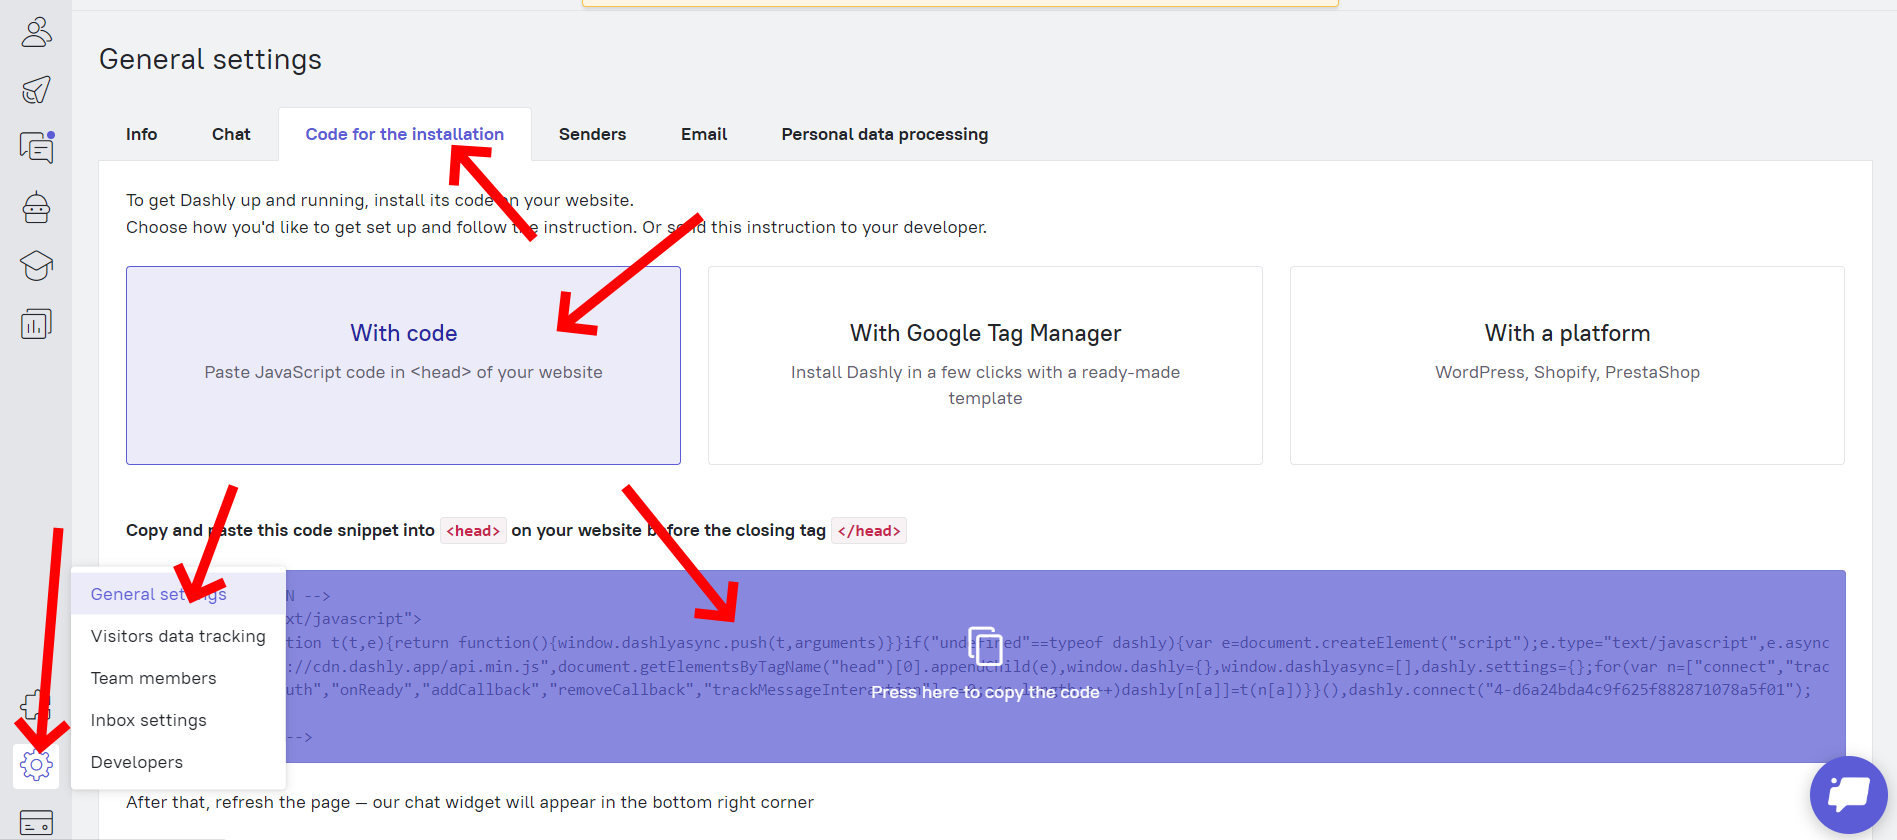
You can also install code using CMS, choosing "With a platform" or opening "Integrations" section in admin panel.
Important! If you hav installed Dashly using CMS, code should not be pasted to your html pages manually.
Where should I paste the code?
As spoken above, you should insert code to your site html code.
The best place to do it is <head> section in your html, just before closing </head> tag.
Adding code via Google tag manager or it’s analogs is not prohibited, but is not recommended,
as this method increases script’s loading time, thus creating a probability of some events not being tracked.
Detailed setup process
You can use our knowledge base for getting the most detailed setup process.
Installation verification
There are several ways to verify installation. The most simple are:
-
Our chat icon should appear on your site.
Important! Chat would not appear if it was switched into hidden mode in admin panel settings (it is visible by default).
-
Go to "General settings" section in admin panel, click "Code for the installation" tab, choose any option. After that write your site url into input field and push "Check if the code is installed" button.
-
You can type
dashlyin the browser console to see Dashly object contents.